How to Make Ham
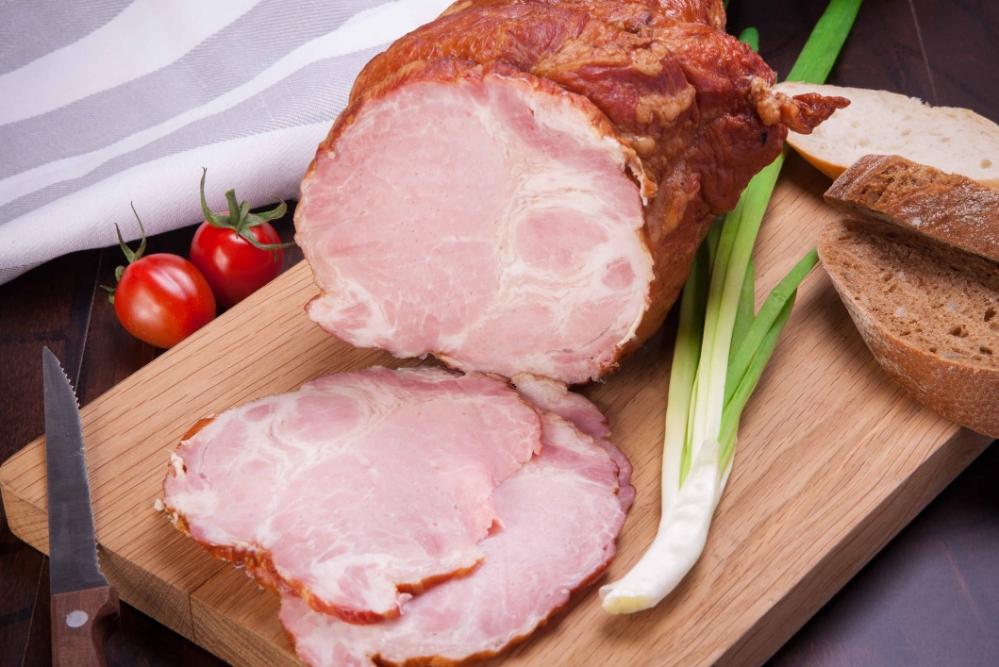 Curing a cut of pork to make your own home made ham is a lot easier than many people think. The most popular meat to use is pork, shoulder (picnic ham) or hind leg (leg of ham), but you can make a ham out of just about any piece of meat from almost any animal. Ham can be made with the bone in or out. Basically, you need to pump the ham with a certain percentage of brine (usually around 25% of its weight as per your recipe). Pump/inject in areas close to the bone and 75mm (3 inches) from the surface.
You then need to submerge your ham in the brine and leave in the fridge for 4-10 days, depending on the size of your ham and how salty you would like the finished product to be. We also advise to turn the ham in the brine every couple of days or so.
After it’s cured, you will need to rinse it, then bring it up to an internal temperature of 65C in either an oven or a smoker. Obviously, a smoker is ideal as the flavour of smoked ham is impossible to beat!
Check out our full recipe below (and scroll to the bottom for a link to our Youtube tutorial):
HOW TO MAKE HAM – A BEGINNER’S GUIDE
Ingredients:
– Cut of meat of choice (see Step One)
– Misty Gully Ham Cure -or-
– Cure #1 6.25%, Kosher Salt, Brown Sugar
– Pickling Spices
Essential Equipment:
– Brine Injector
– Container / Bucket / Tuperware large enough to hold you cut of meat and fit in the fridge
– Temperature Probe
Optional Equipment:
– Smoker
– Wood Chips
– Liquid Smoke
– Ham Bag (for storage)
Step One: Choose your cut
Ham is traditionally made from the hing leg or the shoulder of pork. For beginners, we recommend you try making a ‘picnic’ ham from the shoulder first. The meat tastes pretty similar and the process is a bit quicker and easier first time around. Once you’ve nailed the basic process and understand the science of what’s going on a little bit – taking the next step to making a whole leg of ham from scratch will be less daunting and will have a higher chance of success.
Most picnic ham’s will be around 2 to 3kg and this is the perfect place to start. Make sure you accurately weigh your meat before you start the next steps, as it’s important for step 2 and 3.
Step Two: Prepare your brine.
How much brine you make depends on how big your piece of meat is. A general rule is you need to make enough brine to fully submerge your ham in it’s container + about 25% extra for pumping.
If using the Misty Gully Ham Cure – max approximately 130g of the pre-mix cure with each liter of room temperature water. If you want to add additional pickling spices, add those as well and stir until most of the sugar appears to have dissolved.
If you are making your own brine from scratch, please refer to our basic brine recipe here.
Step Three: Inject your meat
When making ham, it’s very important you inject your meat with your brine as this ensures your meat will cure thoroughly. This is especially important when using a cut with bones in. Inject as deep as possible ensuring cure is throughout the meat. If your meat doesn’t cure properly it will not end us as ‘ham’ throughout. Parts of the meat that aren’t cured will be grey, and essentially just roast pork!
Your ‘pump rate’ is 25%. That is, if your meat weighs 2kg, then you need to inject it with approx 500ml if brine.
Step Four: Cure your meat
Once you’ve injected your meat thoroughly, place it in the remaining brine in your container of choice and place in the fridge. Ensure the meat is fully submerged. Curing generally takes 5-7 days. As a general rule of thumb, allow one day per 500g of meat. So for a small 2kg picnic ham, you’ll need about 4-5 days to cure. For large cuts / full legs of ham, cure for a maximum of 8 days.
What happens if you cure for longer? Well, not much. What will happen is the salt, cure and pickling spices will further penetrate the meat, but usually the end product will be an overly salty one, so that’s why we recommend sticking to the timeframes above.
Step Five: Rinse and Soak
After the curing process, remove your meat and thoroughly rinse it under a cold running tap, ensuring to remove any and all excess salt and spices. After this, soak your meat in room temperature water for 2 hours to further remove excess saltiness and cure.
Step Six: Equalize and for the Pellicle
Place the meat on a plate uncovered inside your refrigerator for 24 hours. During this time two things happen. 1) the remaining cure and salt should ‘equalize’ throughout the meat, resulting in a less salty and more ‘even’ tasting final product. 2) your meat will form a ‘pellicle’. This is a tacky sheen that will appear on the surface of your meat. The pellicle will help your meat more readily absorb a smokey flavour when it comes time to smoking.
Note: Step Six is optional. If you don’t have time, or simply can’t wait to eat some ham – skip to seven!
Step Seven: Bring your meat to temp and turn it into Ham!
Yep, that’s right. It’s here at this step where you’ll no longer have a hunk of meat, but rather, a delicious ham. Set your oven or smoker to 110c. Cook your ham until it reaches an internal temperature of 65c. If using smoke, recommended chips include: apple, maple, cherry, pear, plum, pecan, hickory and peach. See our full range here. Alternatively, if you’re just using your oven and don’t have a smoker, but would still like to add a smoke flavour profile, then as always why not add some Misty Gully Liquid Smoke? Just spray all over before cooking. For small picnic ham, it should take around 2 hours. For larger cuts like a full leg it will take longer. We have cheap but good quality thermometers are available here.
Step Eight: Enjoy!
Your ham ham is now ready to enjoy. You can eat it hot straight from the smoker, or alternatively, allow it to cool before storing it in the fridge in a Ham Bag for up to 2 weeks.
For extra flare though, at this stage you can also score and dress your ham, cooking a little longer with an extra glaze. For tips and an example, check out our Christmas Ham recipe here.
At Smoked and Cured, we provide a variety of pellet smokers, electric smokers, and more. Browse our selection today!
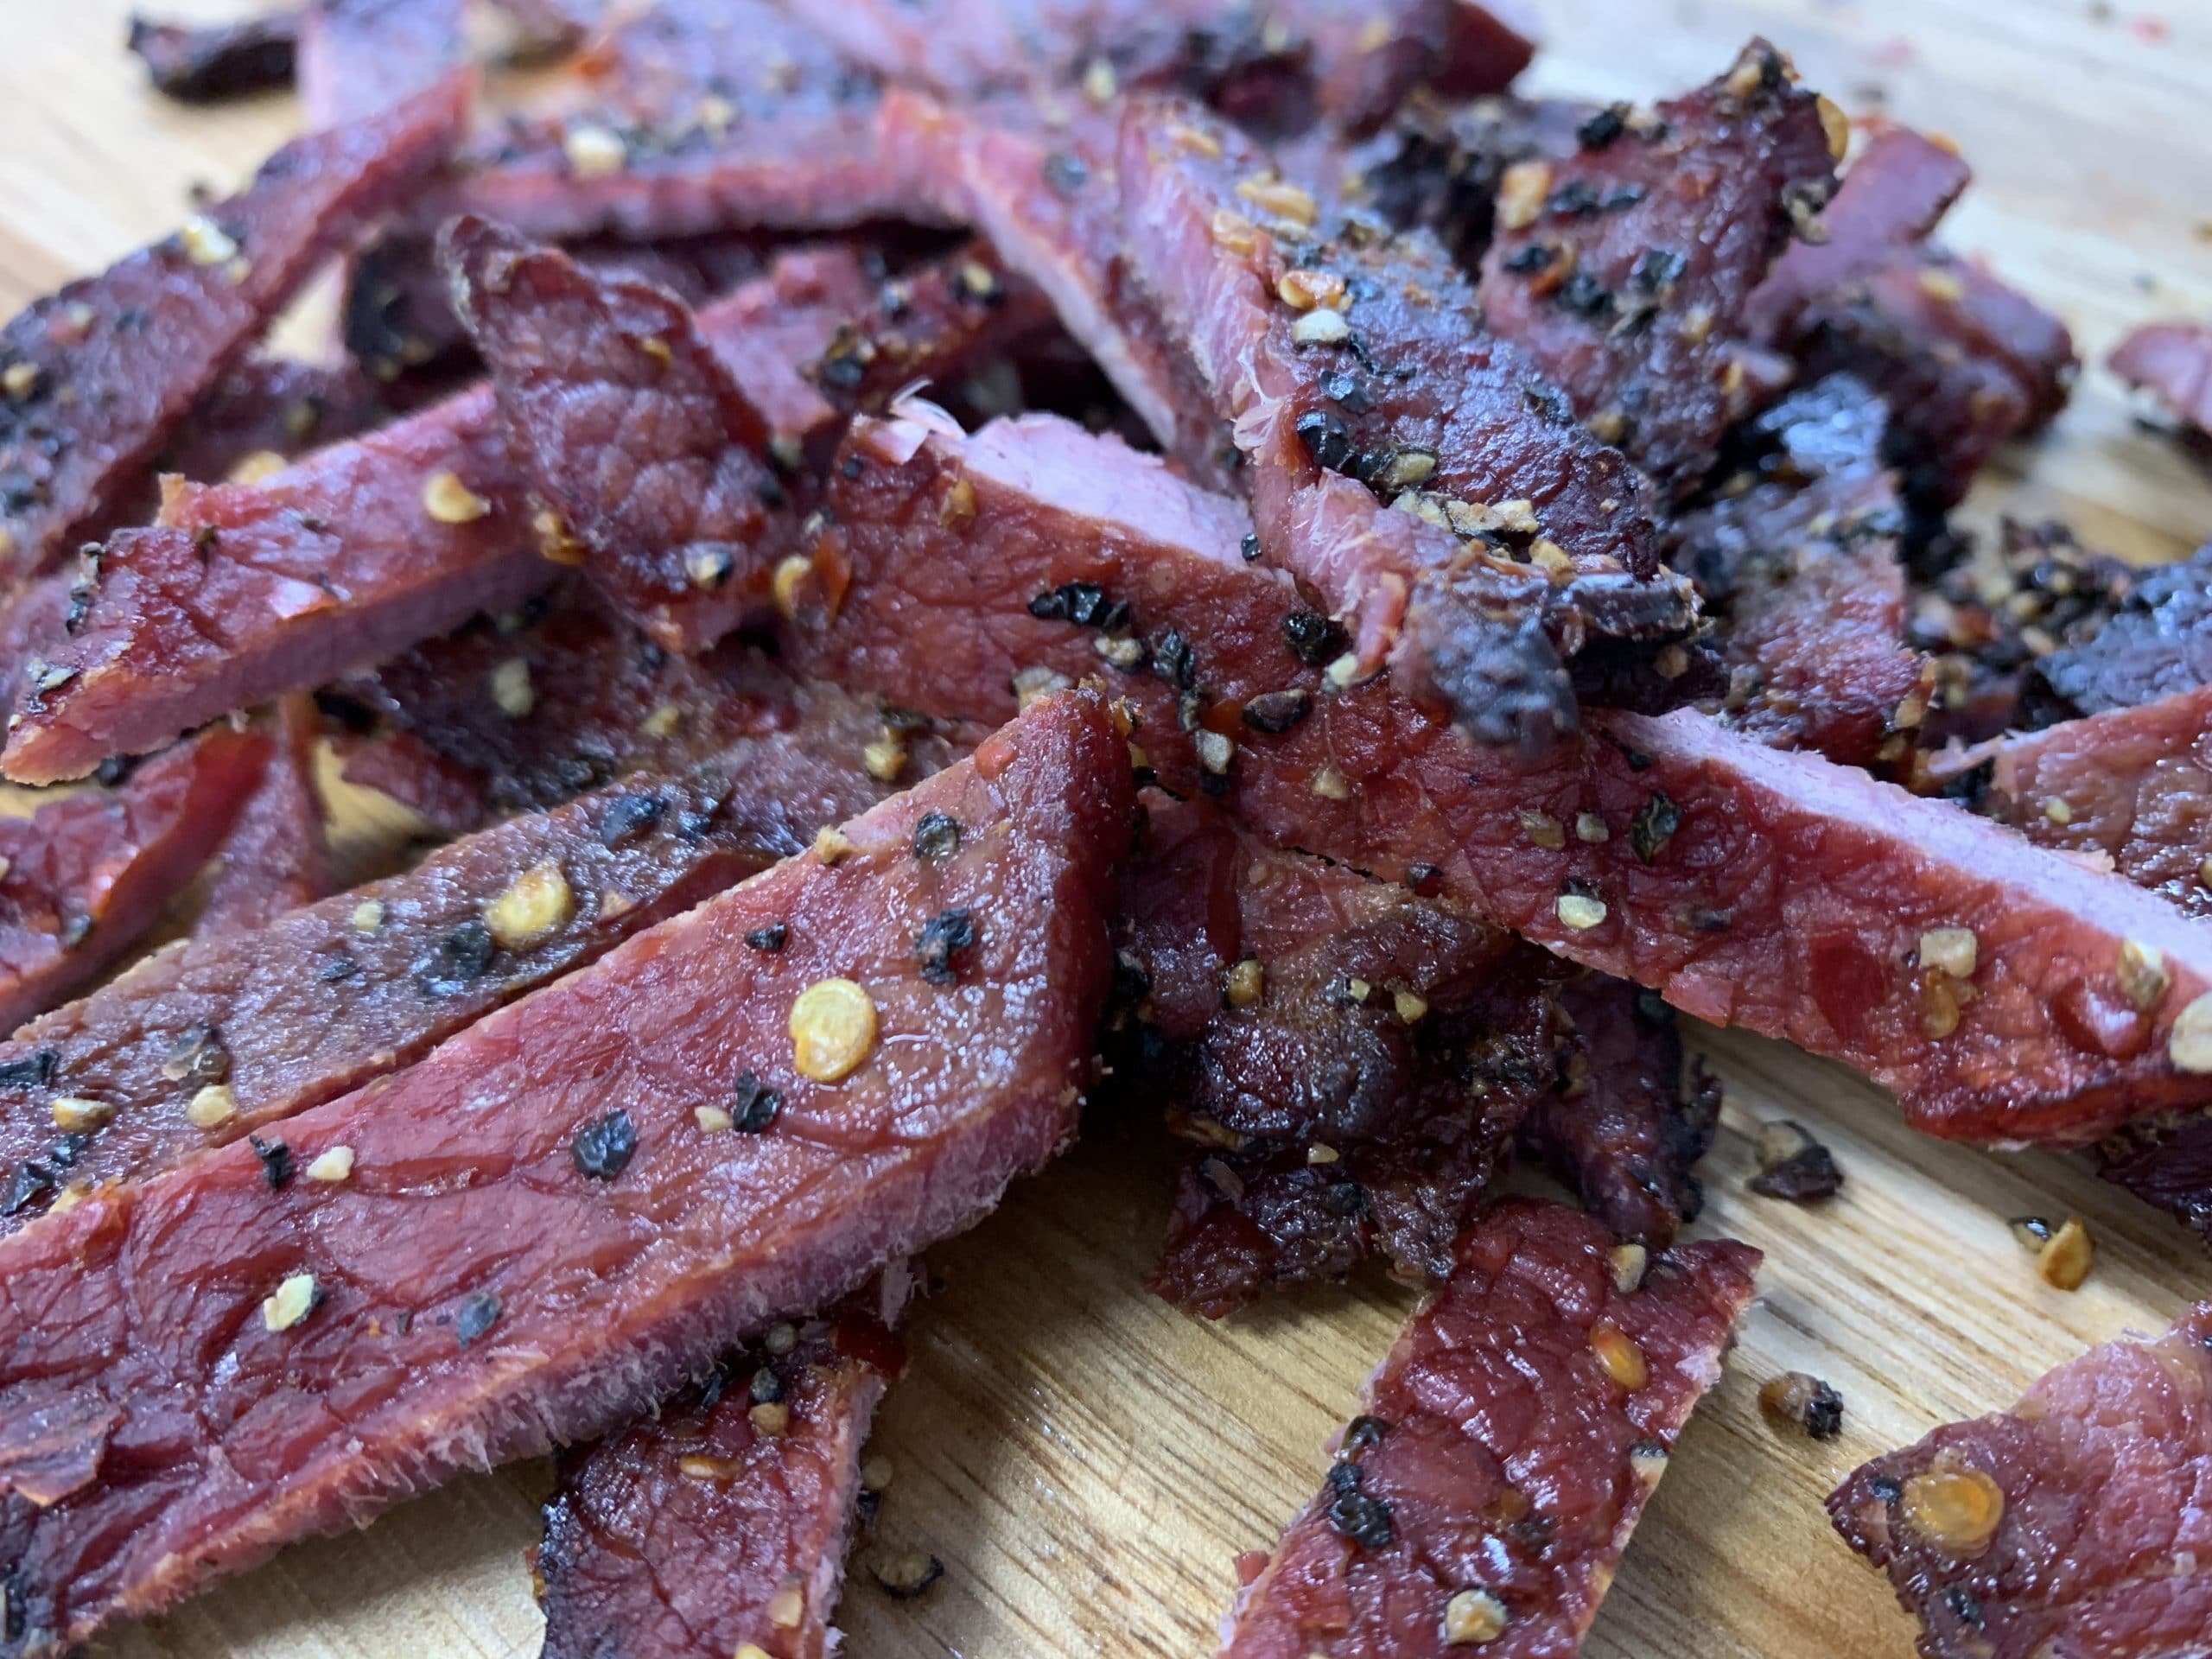
How to Make Quick and Easy Oven Jerky
This chilli and pepper jerky recipe is so quick to make and easy to do in your oven at home! Alternatively, you could also make this in a smoker. Make sure to choose a lean cut of meat with little…
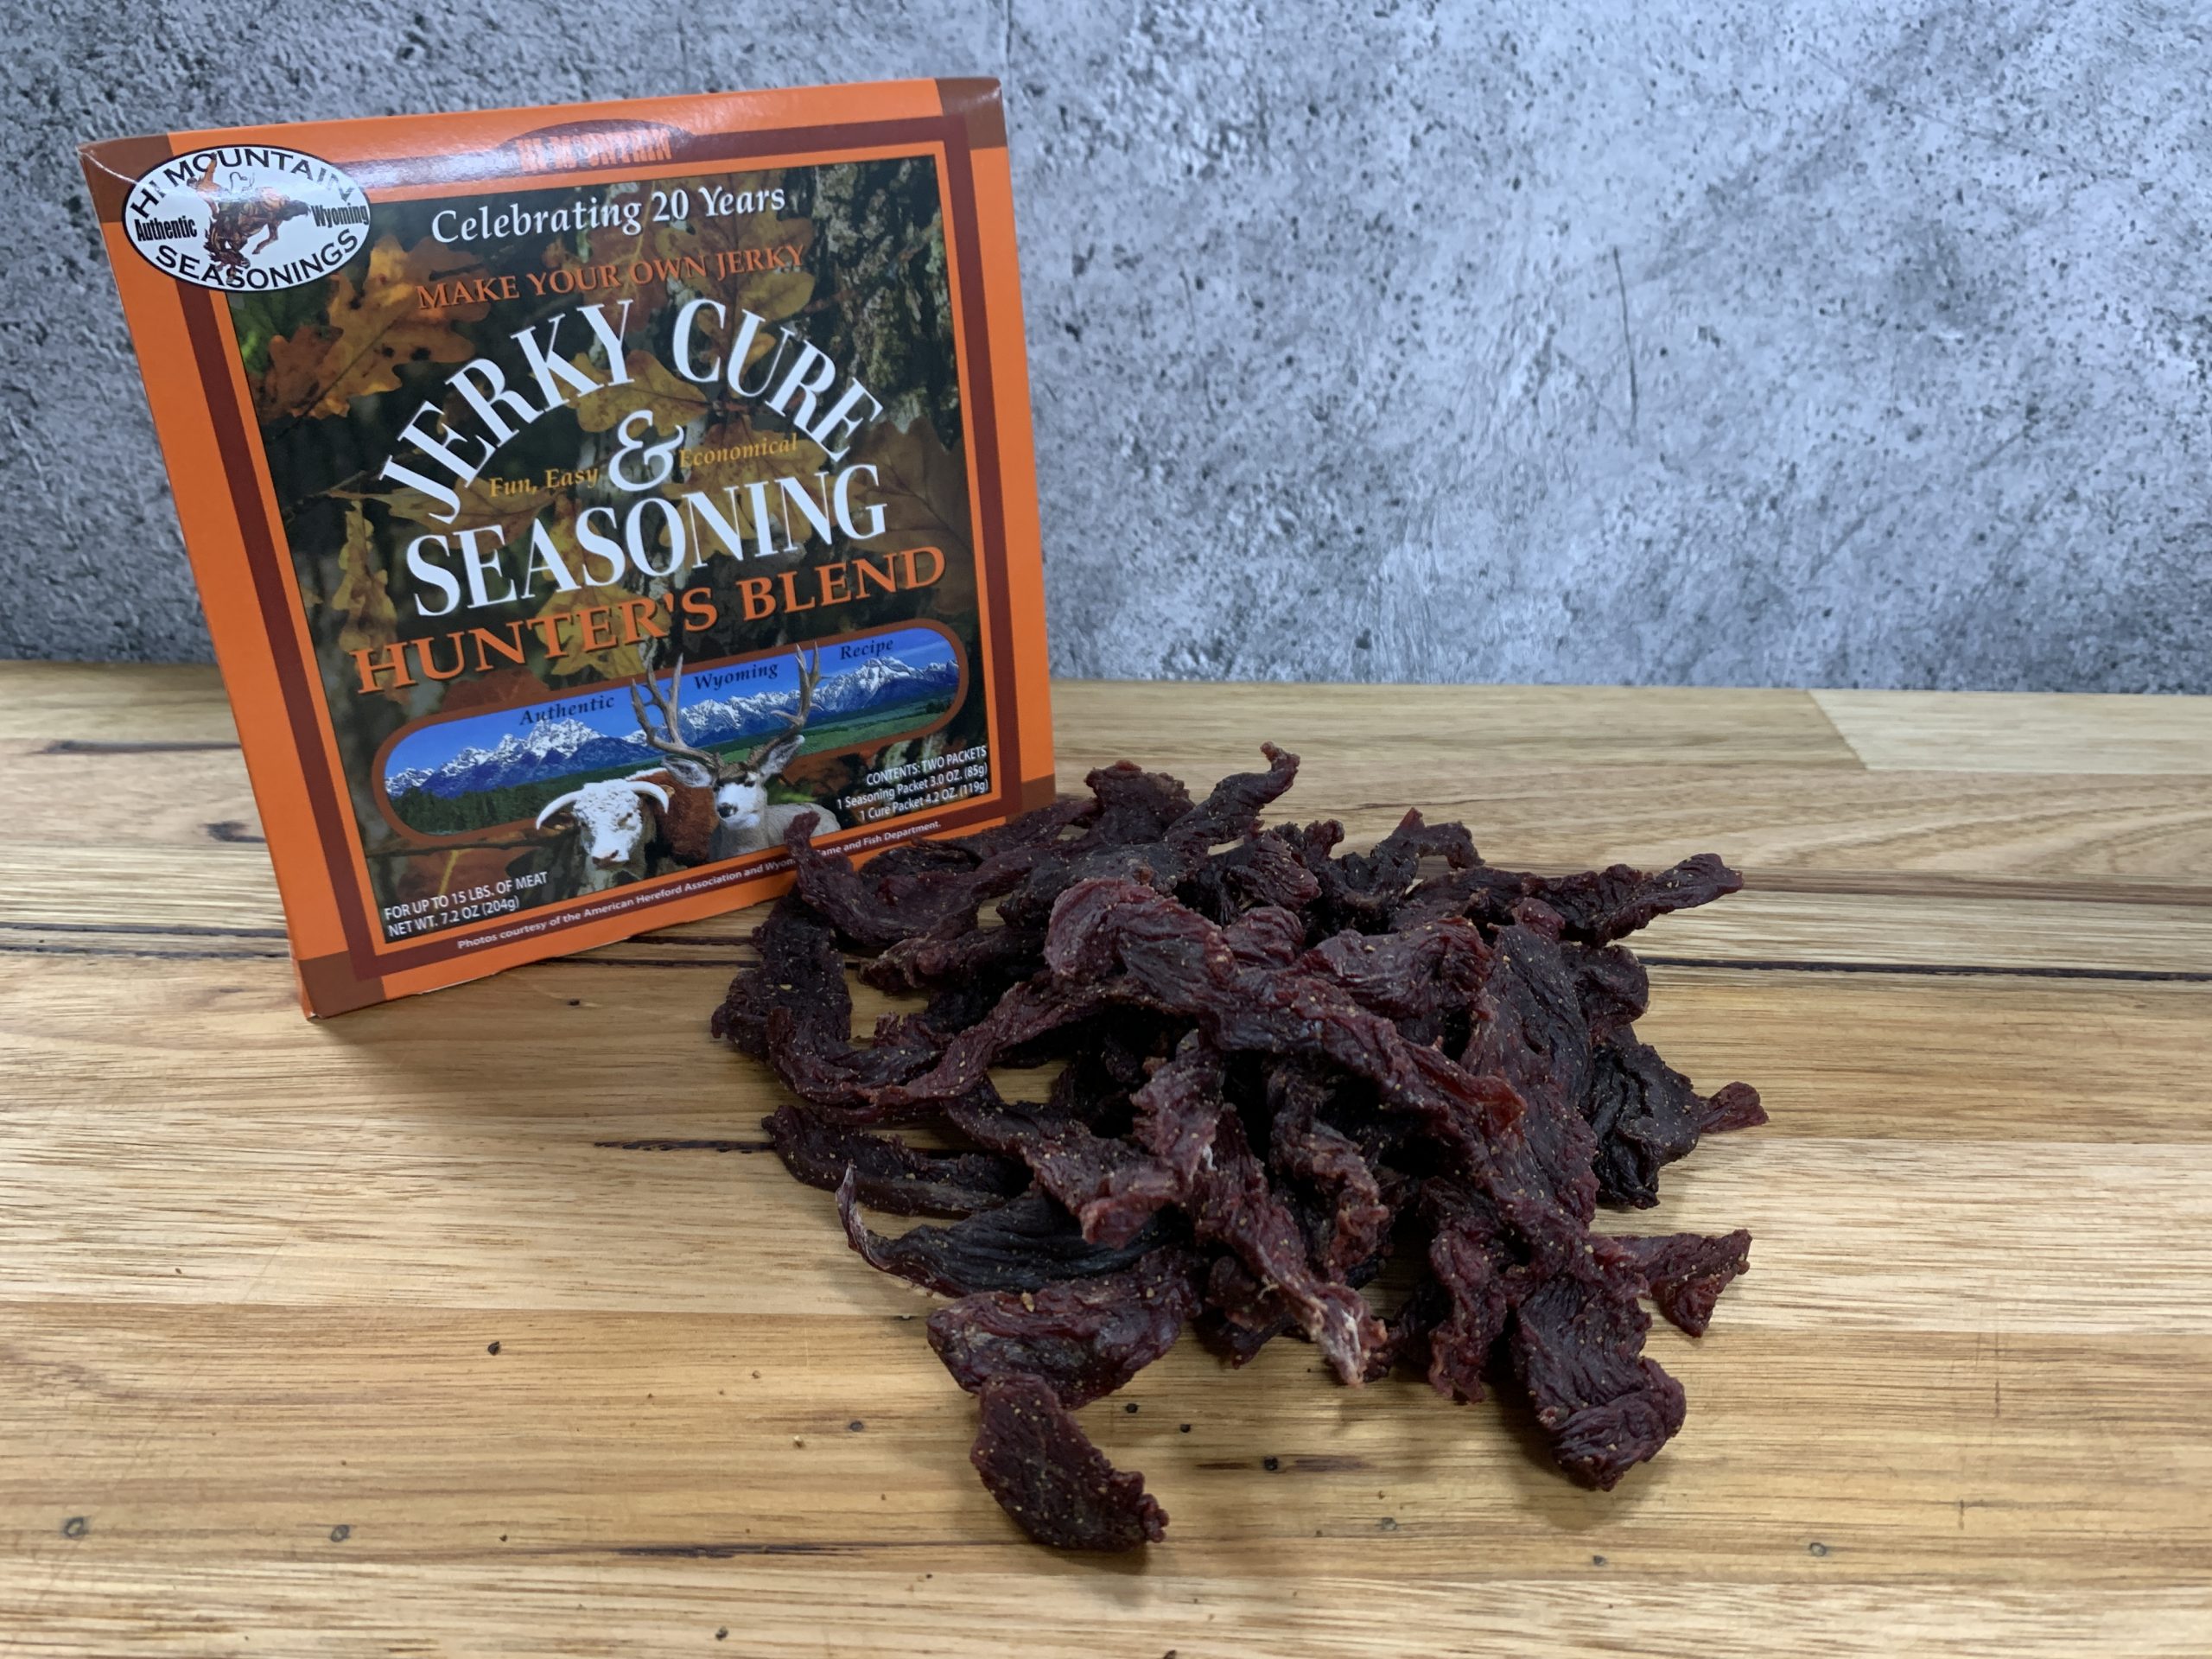
How to Make Jerky
Jerky is really simple to make and one of the quickest things to cure. What's more - you don't need any special equipment to make it! With the Hi Mountain Jerky Cure and Seasoning Kits making jerky…
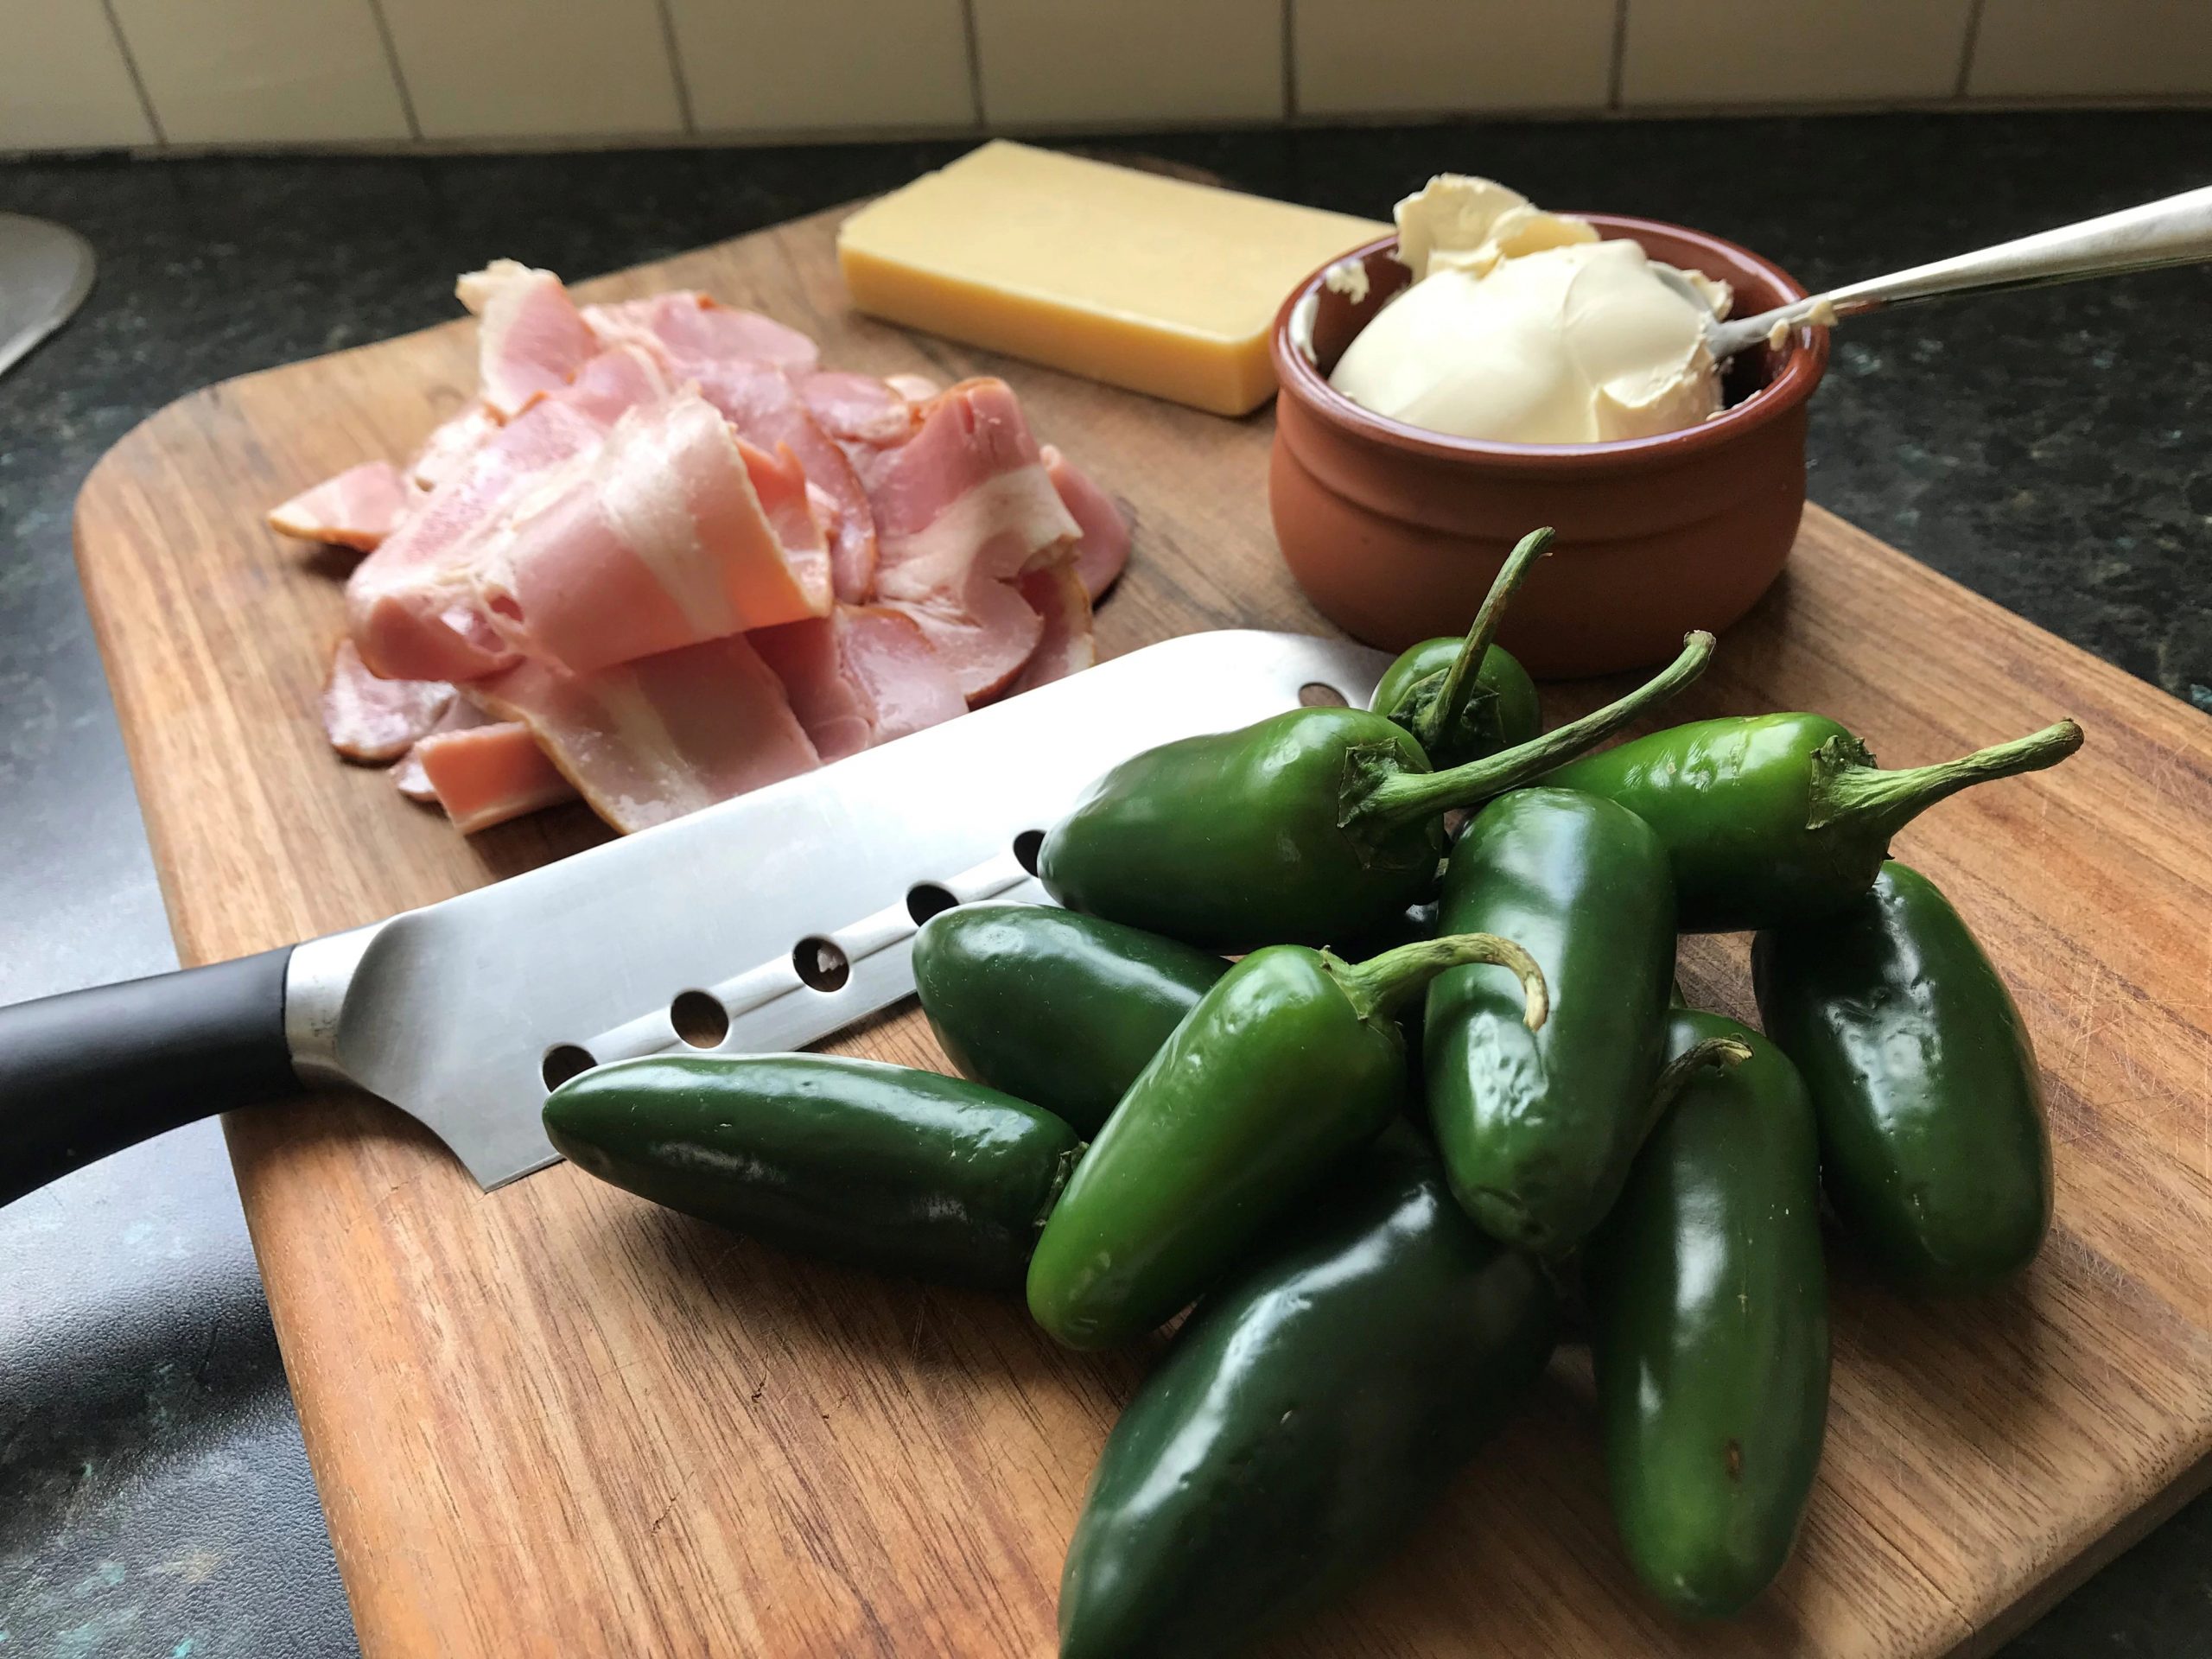
How to make Jalapeno Poppers
These smokey, spicy and creamy jalapeno poppers are not only delicious, but so simple to make. Never tried one before? Once you've tasted just one bite of these you'll be wondering how you ever lived…
